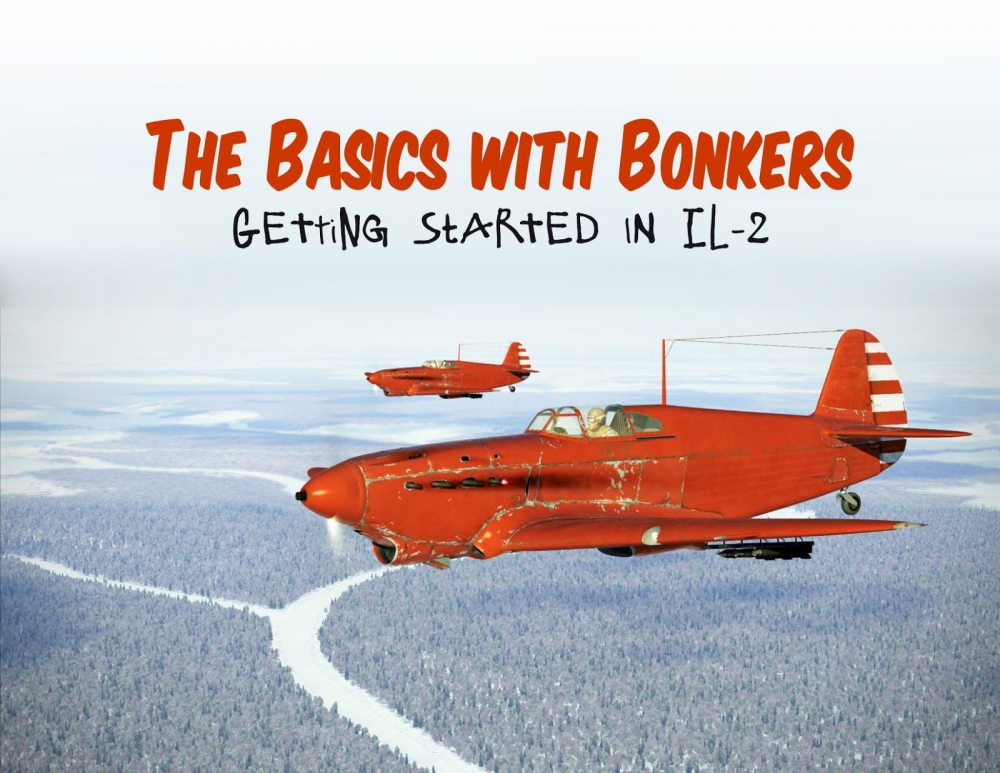
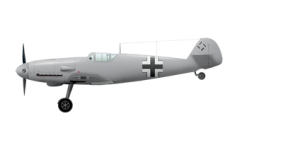
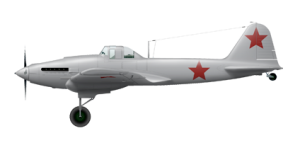
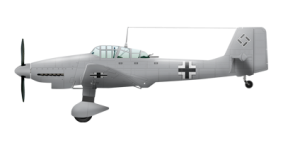
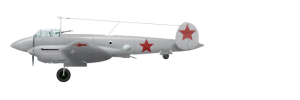
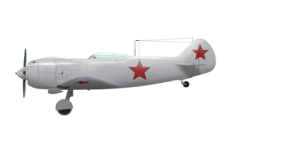
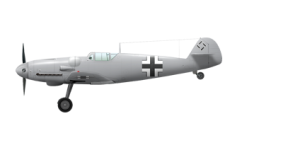
The Basics with Bonkers - wiki edition
![]() Warning: This wiki adaptation is artistically inferior to the original. For best experience download the original PDF of the guide.
Warning: This wiki adaptation is artistically inferior to the original. For best experience download the original PDF of the guide.
Chapter 1: About the Game
IL-2 Sturmovik: Great Battles is the third generation in a series of IL-2 titles from Russian developer 1CGS. It is the successor to the
original IL-2 Sturmovik/IL-2 Sturmovik: 1946 and IL-2 Sturmovik Cliffs of Dover games, and stands alone as a completely new
game on a new engine, featuring DX11 and VR support. The “Great Battles” title includes a series of modules, or expansion packs,
each based on a different time period, plane set, and theatre of WW2. Beginning with the release of “Battle of Stalingrad” in 2013,
1CGS has developed new expansions on a regular basis, and the current list of modules includes:
- ● IL-2 Sturmovik: Battle of Stalingrad (BoS)
- ● IL-2 Sturmovik: Battle of Moscow (BoM)
- ● IL-2 Sturmovik: Battle of Kuban (BoK)
- ● IL-2 Sturmovik: Battle of Bodenplatte (BoBP)
- ● IL-2 Sturmovik: Battle of Normandy (BoN)
- ● IL-2 Sturmovik: Flying Circus (FC)
- ● IL-2 Sturmovik: Tank Crew
Collectively, these modules are referred to as “IL-2 BoX.” Here’s the fun part—they all exist in the same game world! If you own one module, you get to play on ALL of the maps in multiplayer. You can even enter the gunner positions of other players’ planes—you just cannot fly the planes from a module if you do not own it. We’ll talk about the specific maps and planes included in each module in just a moment, but first...a quick word on different ways to purchase the game.
Purchasing the Game: Steam vs 1CGS Web Store
The game is available on both Steam and the 1CGS Web Store, for roughly the same price, depending on sales. Fortunately, 1CGS
has very wisely built an integrated account system, so if you purchase Battle of Stalingrad on Steam, you can then purchase
additional modules straight from the developer’s website. You simply create an account on their site, purchase your module, and
activate the key in your profile. Anything you activate is automatically available in your IL-2 game, on either Steam or standalone.
The game downloads each new module once it’s released, so there are no additional downloads when you purchase new modules.
Should I Buy from Steam or the Developer?
I suggest you buy the base game on Steam (IL-2 Battle of Stalingrad) and purchase additional modules from the developer. That
way, you can enjoy the fast download speeds and Steam integration, while still supporting the dev. There is zero difference between
the game applications. If you want to buy any of the modules on Steam, you must own a Steam copy of BoS as the base game first.
Premium vs. Standard Edition: What Is This Pay2Win Bullshit?
Each IL-2 module is available as either a Standard Edition (includes the map and 8 planes) or a Premium Edition (includes an
additional 2 collector planes*). During sales, which happen every few months, the Standard Editions are priced as low as $12.49
and the Premium Editions go for as low as $19.99. The brand new modules are about $60 during sales, so it’s worth starting with
the older modules and waiting a few months. The options in the table below will let you be competitive on most servers.
- ● “What is a collector plane?” you ask in between bouts of heavy breathing. Well, my sweaty-palmed friend, these gems are sold
separately from the Standard Edition game. If you purchase the Premium Edition, some are included with your base plane pack. Do
you need them? Debatable. Are they worth it? Yes, some of them are. Collector planes go on sale for $9.99, $4.99, or less,
depending on how recent the release was. (All prices in table below are average sale prices)
1CGS knows what they’re doing, so collector planes are often the coolest, funkiest, or most desirable planes of the module time
period. That being said, they are not always the best or most competitive planes of the pack, so it’s not necessarily a pay2win
system. Nobody is buying the U-2VS biplane, MC.202 spaghetti monster, Ju 52 flying garbage truck, or the Hs 129 duck because
they want a leg up on you in combat. They are, however, buying some of the other collector planes to do just that (looking at you
La-5, La-5FN, Fw 190 A-3, Fw 190 D-9, Yak-1b, and P-38). Collector planes are available on Steam, as well as the 1CGS Web Store,
so even if you can’t buy a Premium Edition on Steam, you can still buy the Standard Edition + both collector planes to end up with
the same deal.
Which Modules Should I Buy First?
| Best Bang for Your Buck | Ballin’ on a Budget | Burn, Baby, Burn |
|---|---|---|
| BoS Premium $22 | BoS Premium $22 | BoS Premium $22 |
| BoK Standard $12 | BoK Standard $12 | Everything else |
| Example | BoBP Premium $44 | Even Tank Crew |
| Total: $34 | Total: $78 | Total: Just your dignity |
Chapter 2: Modules, Maps, and Planes, Oh My!
Battle of Stalingrad (BoS)
IL-2 Sturmovik: Battle of Stalingrad is the “base” game of IL-2. If you’re new to the series, it should be your first purchase. It’s got a great plane set that will let you find a plane to fly in the majority of multiplayer games. You might not be super competitive in late war maps, but BoS is the bread and butter of IL-2. The map is set around Stalingrad during the winter of 1942/43, so expect to be cruising around the Volga enjoying late Autumn foliage or the frozen hellscape of a Russian winter.
Soviet |
Axis
| |
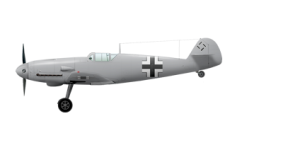
| LaGG-3 Series 29: A brawler built of equal parts plywood and Communist grit, the LaGG is one of the most durable—and devastating—Soviet fighters of the war. Featuring an optional 23mm or 37mm cannon (take the 23), it shines at low altitude fighting. | Bf 109 F-4: Fast, deadly, and able to engage on it’s own terms, the F4 is a plane to be feared. Like most 109s, it’s fairly fragile, but hits hard, climbs like a rocket, and carries enough ammo to stay in the fight all day long. | |
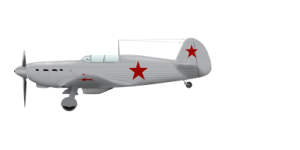
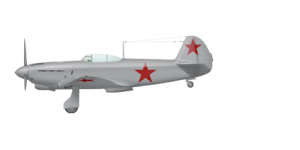
| Yak-1 Series 69: The faster, more elegant companion to the LaGG-3, the Yak 1 is the workhorse of the Soviet airforce. It’s extremely maneuverable and makes an excellent turnfighter. | Bf 109 G-2: Slightly heavier than the F4, the G2 is a little more sluggish, but more controllable. Unlike the F4, it features a governor, so you can run at 100% throttle without fear of blowing the engine. It’s an excellent choice for new Axis pilots. | |
| IL-2 AM-38 (model 1942): Like blowing shit up on the ground, shrugging off holes in your wings, and writing graffiti on the sides of your plane to let everyone know what a badass you and your gunner are? Do I have a plane for you. | Ju 87 D-3: Do you have a moment to talk about Jericho Trumpets and 1800kg bombs? | |
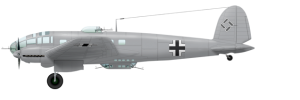
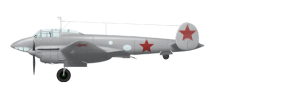
| Pe-2 Series 87: This plane is utter bullshit. You can carry 4x250kg bombs and enough spare parts to keep flying through WW3. I’ve never seen one shot down before. A++ best bomber in the game. | He 111 H-6: There’s nothing quite like seeing an He 111 in the air. Especially if you’re Soviet. Because who doesn’t love a free kill? This plane is best flown at high altitudes so nobody can see you. Have fun climbing above the clouds, asswipe. See you after the war. | |
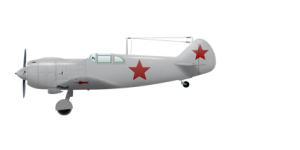
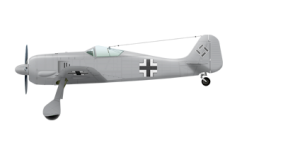
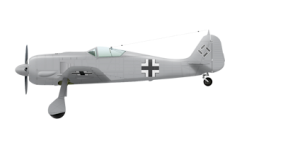
| *Collector Plane* La-5 Series 8: A true ambush fighter. This bitch is fast and deadly, but those twin 20mm cannons go through ammo quickly, so make your shots count. You’re pretty much the king of speed on he deck. You can roll, but you can’t turn. Also, deflection shooting is tough because someone was high AF when they mounted those cannons. | *Collector Plane* Fw 190 A-3: The gentleman’s fighter. This butcher bird is a work of art. Your job is to boom and zoom and never look back. They give you (2) 20mm cannons, but you can double that with wing-mounted MG-FF pods. Which you should. Because a true artist doesn’t just shoot a plane down, he turns it into confetti. |
Battle of Moscow (BoM)
IL-2 Sturmovik: Battle of Moscow is the second installment in the series, but it’s actually set earlier in the war, from October 1941 to April 1942. It includes the area around Moscow, in both Autumn and Winter seasons. You get quite a few funky little planes in this module, some of which are quite fun and charming, if lacking in performance (relative to the later war modules).
Soviet |
Axis
| |
|---|---|---|
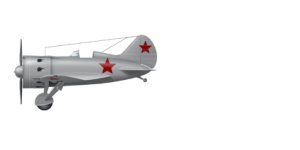
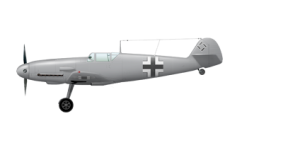
| I-16 Type 24: Nicknamed the Ishak (donkey) or Rata (rat), you can’t help but love this plane. It will try to murder new pilots, but after you spend 15 minutes hand-cranking that landing gear up for the first time and hear that canopy door you forgot to close tear off in the wind, you won’t care about anything else. You’re now a hot 1980s beach chick in your drop top, wind in your hair, cruising for low and slow German tourists to absolutely ruin. | Bf 109 E-7: This plane turns very well. That’s about the only nice thing I have to say about it. | |
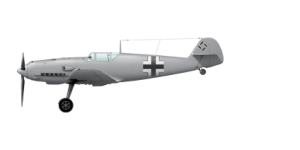
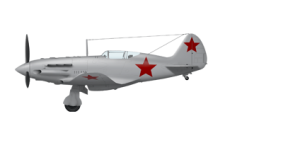
| MiG-3 Series 24: In the hands of a capable pilot, this is an impressive high-altitude fighter. For the rest of us, it’s a plane we take when there are no more Yak 1s or LaGG-3s available. Powerful cannons and fast speeds up high, but limited visibility and poor performance on the deck. | Bf 109 F-2: If the 109s were your children, this little guy would be the one bringing home B’s with the occasional C+. Not the best, but it gets the job done. You have the option to mount a 20mm MG 151/20 cannon in the nose. Take that option, please. | |
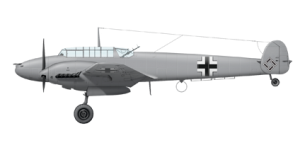
| IL-2 AM-38 (model 1941): There’s no gunner turret on this model, which is 1941’s way of telling you to bring two of these planes instead of one. | Bf 110 E-2: Not quite agile enough to be a fighter, nor durable enough to be an attacker, this 110 is best used for dropping bombs and then running away. You do get two 20mm cannons that will shred anything dumb enough to get in front of you, so if you find enemy attackers, let ‘em have it. | |
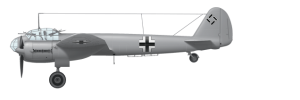
| Pe-2 Series 35: A slightly not-as-great version of the BoS Pe-2. Don’t worry, it’s still great. | Ju 88 A-4: If you’re going to fly a German bomber, this is the one you want. Decently fast and you can carry enough ordnance to flatten a city. The gunner isn’t quite as deadly as the mofo in the Peshka, but he tries his best. | |
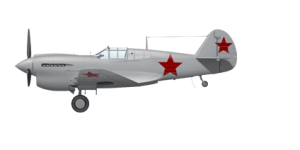
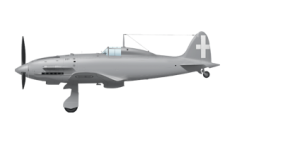
| *Collector Plane* P-40E-1: A lovable American plane full of cockpit space and .50 cal rounds. The devs get some flak for modeling the engine limits too conservatively, but she’d never win any speed contests anyway. Durable body, great firepower, terrible climb rate. | *Collector Plane* MC.202 Series VIII: Say bownjorno to the war’s most ridiculous plane. Then say goodbye to it, because it sucks ass and will most likely get you shot at from both sides because it looks more like an Allied fighter than an Axis one. |
Battle of Kuban (BoK)
Welcome to the beautiful beaches of the Black Sea, lush fields of green, and the rugged peaks of the Caucasus Mountains—Kuban
is arguably the prettiest map in the game. Plus, you get some fantastic planes as part of the Standard Edition. Set in spring of 1943,
you may recognize some of the locations from the Georgia Map in DCS.
Soviet |
Axis
| |
|---|---|---|
| Yak-7b Series 36: What happens when you accidentally make a trainer that’s better than your frontline fighters? Yank the back seat out and it becomes your new frontline fighter! Armed with a 20mm cannon and two 12.7mm guns, this plane is speedy, durable, and extremely capable. | Bf 109 G-4: Essentially a heavier version of the G2 without a governed engine, this 109 is a solid performer. A bit slower in the climb, due to a fixed tailwheel, extra beef, and other changes, it’s still a nice progression in the 109 family. | |
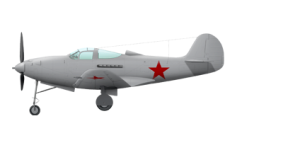
| P-39L-1: Tricycle gear, car doors, an engine behind you, and a goddamn 37mm cannon are just a few of the things to love about the P-39. Enjoy incredible dive speeds and devastating firepower, tempered by lackluster climb rates and unimpressive top speeds | Fw 190 A-5: It’s hard to improve on the A-3, but those wacky krauts did it. You’re now even faster, but you do have cowling flaps to manage (lol jk, set them at like 5% unless you’re doing dumb shit). | |
| IL-2 AM-38F (model 1943): Pretty much the Cadillac of IL-2s. Flies like one, too. | Bf 110 G-2: The best 110. Decently fast and packed with nasty firepower, this plane will tear anything apart. It’s a big target—and not a great dogfighter—but you can hold your own in a brawl. | |
| A-20B: While not as formidable as the Pe-2, the A-20 is still a welcome change to the Soviet lineup. It’s fun to fly, holds a diverse bomb payload, and looks adorable. | He 111 H-16: Upgraded turrets and a heavy bomb load are two welcome improvements to the He 111 series. This plane is still basically a deathtrap, so stay high and level bomb. | |
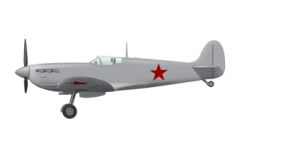
| *Collector Plane* Spitfire Mk.VB: The legendary Spitfire is graceful and wonderful to fly. You’re extremely agile, decently quick, and deliver brutal attacks with twin 20mm Hispanos in the wings. With only a few bursts of cannon ammo, you have to make your shots count. | *Collector Plane* Hs 129 B-2: Quack, quack! The Duck is ideal for pilots who love destroying tanks and hate going fast. |
Battle of Bodenplatte (BoBP)
It’s late war, winter of 1944/1945. Allies are closing in on the meticulously maintained concrete runways of the Luftwaffe in western
Germany, the Netherlands, and Belgium. Welcome to the Jet Age, bitches. It’s about to get fast and deadly up the Rhineland.
Allies |
Axis
| |
|---|---|---|
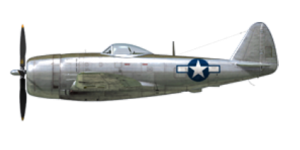
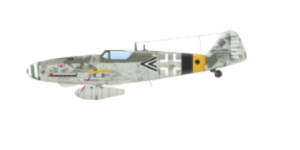
| P-47-D28: Unfortunately not quite as robust as its real-life counterpart, the Jug deals massive amounts of firepower, but also likes to get set on fire. It’s also enormous, if you’re into thicc girls. | Bf 109 G-14: Fast and you get a 30mm cannon. That’s all you need to know. Have fun! | |
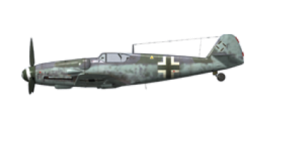
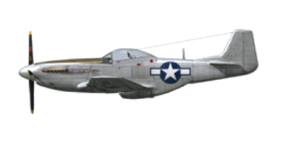
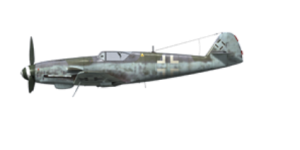
| P-51D-15: Cadillac of the skiiiieees! Gyro gun sights and a G-suit? Look at Mr. Fancypants! The P-51 is an amazing plane, a joy to fly, and insanely fast. Take <70% fuel to keep the rear tank empty, or you’ll suffer. | Bf 109 K-4: Jesus Christ, it’s an even faster 109. This demon plane is built for pure acceleration, climb rate, and speed. | |
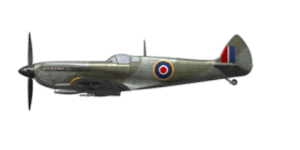
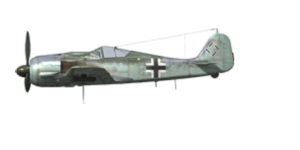
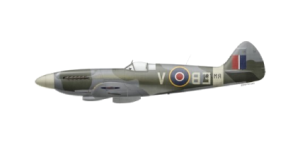
| Spitfire Mk.IXe: An even more sinister Spitfire, with curves in all the right places—plus the option to take clipped wings! You also get two choices of engines: the Merlin 66 for low altitude and Merlin 70 for altitude performance. | Fw 190 A-8: The OG boom and zoomer gets even boomier and zoomier. You get bigger machine guns, (4) 20mm cannons, and 30mm wing-mounted cannons. Plus you can carry enormous bombs! | |
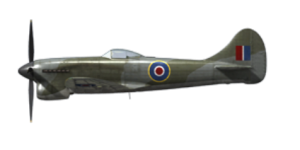
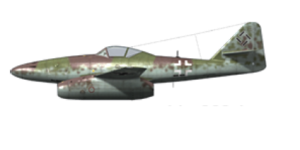
| Tempest Mk.V ser.2: This plane is cheat mode and shouldn’t be used by any self-respecting gentleman. Stay on the deck and chase those Jerries down, you scoundrel. | Me 262 A: This plane is a cheat mode and shouldn’t be used by anyone. Fortunately, newbies can’t fly it, because it’s the most difficult plane to start. Heaven forbid you get one in the air. The only thing that can bring you down is lack of fuel. | |
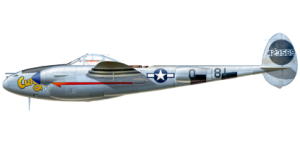
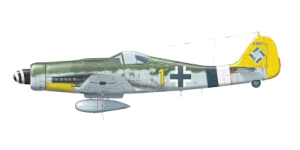
| *Collector Plane* P-38J: Imagine a smaller B-17 that can chase you down and haunt your dreams. That was the design spec for the P-38J, verbatim. Load it up with 500lb bombs, blow up a town, and then get in the fight. | *Collector Plane* Fw 190 D-9: Get a load of the snout on this pig. Apparently, the Germans decided to stop making sexy planes and just go hog wild with the performance features. Like other 190s, it’s still not a dogfighter, but you get amazing speed, great climb rate, and serious firepower (plus air to air rockets!). |
Battle of Normandy (BoN)
Day of Days is upon us. Fighting over hedgerows and French whorehouses, the action is fast and fierce. Just as the BoS, BoM, and
BoK maps tie into a close-knit series on the Eastern Front, BoN and BoBP are a matched set in the West. Expect a bit of crossover in
terms of planes, with some interesting variants included in Normandy. The map includes beautiful coastal towns and the
opportunity for daring cross-Channel raids.
Allies |
Axis
| |
|---|---|---|
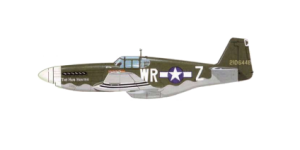
| P-51B/C: This earlier model of the Mustang has a somewhat lighter armament and decreased visibility compared to its later cousin, but still delivers impressive performance. | Bf 109 G-6 Late: Not to be confused with the G-6 “Early,” this 109 variant offers a different canopy design with better rear visibility and a new tail with higher rudder design. It’s very similar to the G-14 in terms of performance. | |
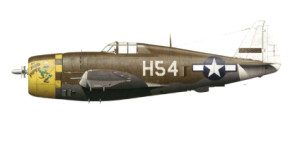
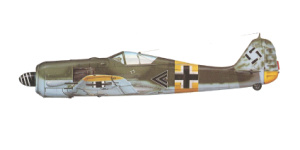
| P-47D “Razorback”: An early version of the P-47 offers essentially the same performance, with a few differences—the most noteworthy of which is the missing bubble canopy. | Fw 190 A-6: A nice mix between the agility of the A-5 and the destructive capability of the A-8, this 190 variant features up to (6) 20mm cannons in a lightweight package. | |
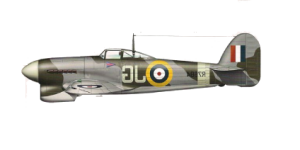
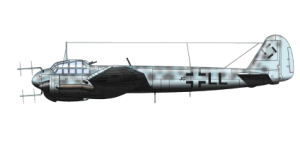
| Typhoon Mk.Ib: Sharing a lineage with the Tempest, the Typhoon is an early derivative with a slightly slower top speed and less maneuverability. It’s still fast on the deck and serves as an excellent fighter bomber, thanks to (4) 20mm Hispanos. | Ju 88C-6a: While the C-6 was often used as a radar-equipped nightfighter, we’re getting the heavy day fighter variant. It features fixed guns in the nose, more armor, and a decreased bomb capacity. | |
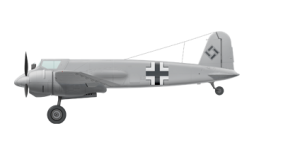
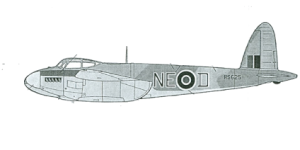
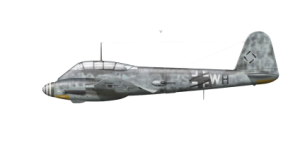
| Mosquito F.B. Mk.VI: This twin-engine, high-speed bomber packs some serious firepower into a beautiful design. While you don’t have any gunners, speed is your greatest defense. | Me 410: An extremely flexible platform, the Me 410 serves as a capable interceptor, bomber, and attacker. Impressive
armament options let you pack some incredible firepower into a fairly nimble platform. | |
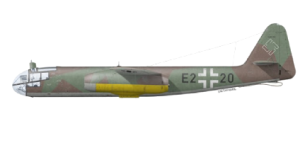
| *Collector Plane* Spitfire Mk.XIV: A beefed-up variant, this Spitfire features a more powerful Griffon powerplant and 5-bladed propeller for incredible performance and a climb rate comparable to space elevators. | *Collector Plane* Ar 234: Imagine being the least popular jet jockey at the airfield. Congratulations, you’re an Ar 234 pilot. Incredibly fast and capable of delivering big ol’ bombs, this plane will certainly add an interesting new dimension to Axis bombing operations. |
Additional Collector Planes
Soviet |
Axis
| |
|---|---|---|
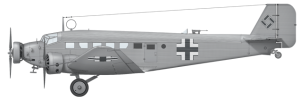
| Yak-1b Series 127: One of the best Soviet fighters. Very fast, exceptional visibility, but limited ammo. | Ju 52/Зm: A flying bus, assembled from the wreckage of a post-cyclone Haitian shanty town. You’re basically the Miss Frizzle of WW2. | |
| La-5FN Series 2: A super plane—boosted, fuel injected, and fast. In 1943, it ruled the sky from the runway to the cloud base. | Bf 109 G-6 Early: Not to be confused with the G-6 Late in BoN, this variant is another solid 109. Additional firepower adds weight as well as a few bulges to the fuselage. |
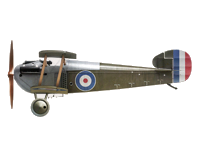
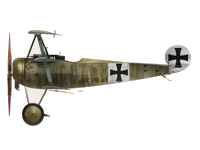
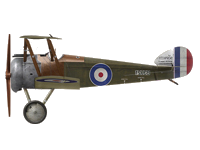
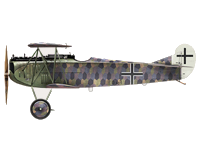
Flying Circus—Volume I (FC)
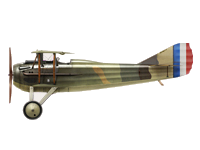
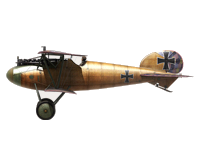
While not necessarily part of the IL-2 universe, Flying Circus uses the same engine and game features as the rest of the IL-2
modules. You can even fly the planes against each other on the same map, if you so choose. This first installment (expect a
Volume II in the future) is essentially an upgrade to the previous WW1 title, Rise of Flight (RoF). With this new version, we get VR
support, better eye candy, and all the benefits of a modern engine...although we have a somewhat less diverse plane set, as it will
take some time to add all of the options RoF offered. The map features the Arras sector of the Western Front, centered on No
Man’s Land. Overall FC is an incredibly enjoyable experience, and the multiplayer is much more accessible, slow-paced, and relaxing
than WW2—and especially well-suited to cooperative play with friends.
Entente |
Central
| |
|---|---|---|
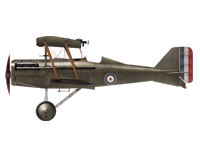
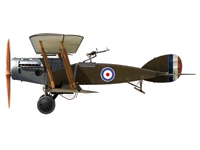
Spad XIII |
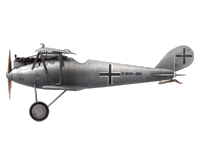
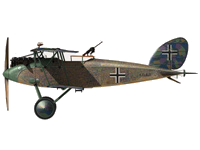
Albatros D.Va
| |
Sopwith Dolphin |
Fokker Dr.1
| |
Sopwith Camel |
Fokker D.VII
| |
RAF S.E.5.a |
Pfalz D.IIIa
| |
Bristol Fighter |
Halberstadt CL.II.
|
Tank Crew—Clash at Prokhorovka
NOTE: To get started with Tank Crew, see IL-2 Tank Crew Basics for Goons
While the IL-2 BoS and BoM owners receive two player-controlled tanks (T-34-76 and PzKpfw III Ausf. L) that can take part in
combined operations with planes, 1CGS decided to release a separate tank-focused module as well. This module features a
smaller, high-fidelity map ideal for tank warfare. Prokhorovka offers detailed buildings, well-placed roads, and forests that make for
interesting tank combat. Although this module isn’t the main focus of the IL-2 series, it’s a nice addition for anyone who’s looking
for a more immersive combat experience. Player-controlled tanks, with visible tank crew, detailed interiors, and full support for VR,
include the T-34-76, KV-1s, M4A2, SU-122, SU-152, PzKpfw III Ausf.M, PzKpfw IV Ausf.G, PzKpfw V Ausf.D, PzKpfw VI Ausf.H1, and
Sd. Kfz. 184. More information to come as this module is developed further.
Chapter 3: In a Bind: Setting Up Controls like a Grownup
Nobody enjoys binding their joystick/throttle/pedals/whatever. You’re the one who bought all that shit, idiot. Stick to the default keyboard binds if it bothers you that much. Fortunately, you really only have to create your binds once, and it takes less than 10 minutes. When 1CGS releases new planes, they’ll default to the binds you’ve already made for other planes, so unless you buy a plane with a wacky new engine injection technology, you don’t have to constantly mess with settings.
Before we get started, a few words on the interface. There is no “search” functionality, meaning you can’t press a button on your joystick and have it take you to the bind. There’s a good reason for this: IL-2 lets you bind multiple commands to the same key. This is a wonderful thing. It lets you control all radiators with a single switch, control trim/stabilizer systems on different planes with the same hat, etc. You can see when you have multiple commands bound to the same key by the presence of a small orange square in the bottom right corner of the input field. Mouse over it to see what other commands you have assigned to the key. Here, you can see I’ve bound two joystick buttons to open and close all of my oil and water radiator shutters, inlet cowls, and outlet cowls:

You can also use modifiers to double your binds—but only “approved” modifier keys like Shift, Ctrl, Windows Key, and Alt. For
example, the default keyboard binds for all of the engine controls use these modifiers and the +/- keys next to backspace. Very
handy if you don’t have room to bind all of them to individual HOTAS buttons/axes.
Oh and don’t worry if you’re new to flight sims and don’t know much about cooling systems or trim or what all of this means, we’ll
go over that in the section on The Fundamentals of Flight...for now, we’ll just take care of the binds so you can hop in a plane and
mess around.
First of all, do you have just a joystick or a full HOTAS with pedals, buttonboxes, etc.?
- ● If you’re only using a joystick, no worries. I still use the default keyboard binds a lot, even in VR. As we go through, just make
note of the keyboard binds and remember them. I’ll point out anything essential that you should have on your joystick buttons/hats/slider with an asterisk.
- ● If you have a HOTAS, feel free to set it up however you feel comfortable. I’ve included a default setup here that should let you
fly most planes fairly comfortably, but use your best judgement if you’ll never touch a bomber, etc.
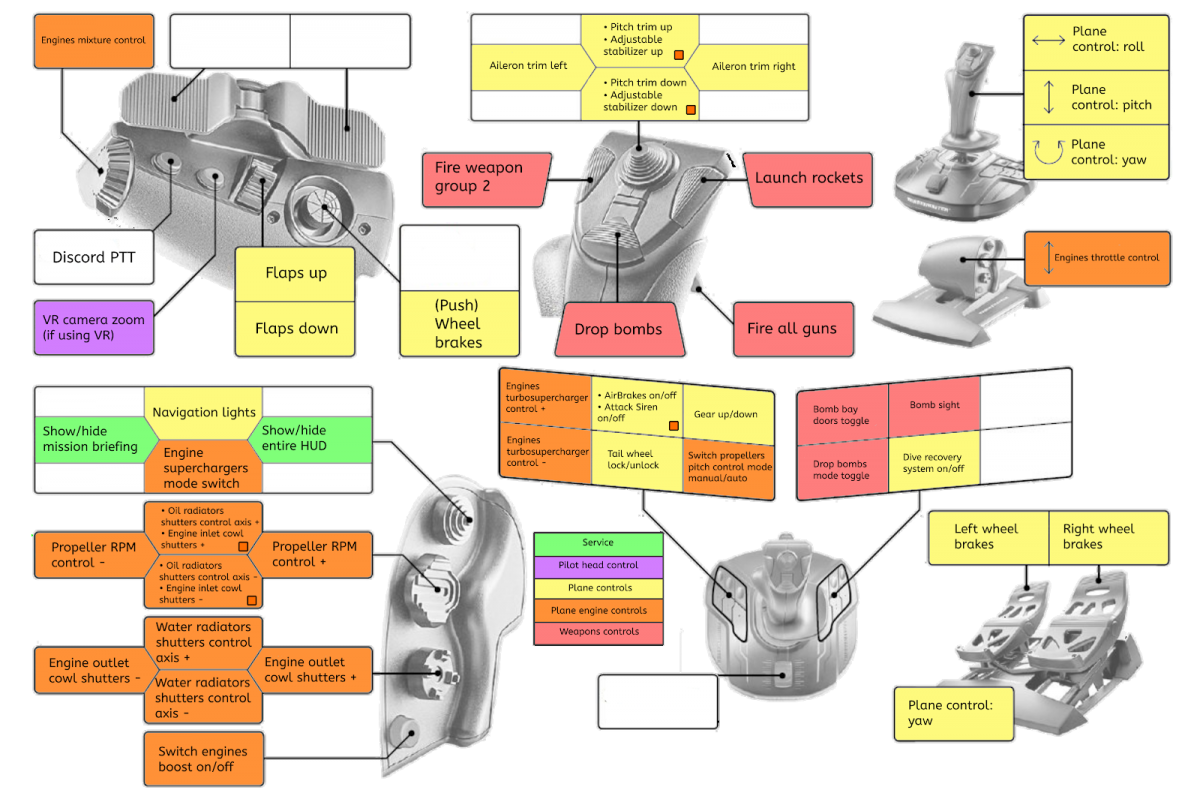
Before you begin binding, skip ahead to the end of this section. There’s a HOTAS diagram with color-coded bind suggestions for each of the different control sections. Let’s start with the most important commands: weapons! From the main menu, click “Settings” and then “Key Mapping.” Using the Controls menu on the left, select “Weapon controls”
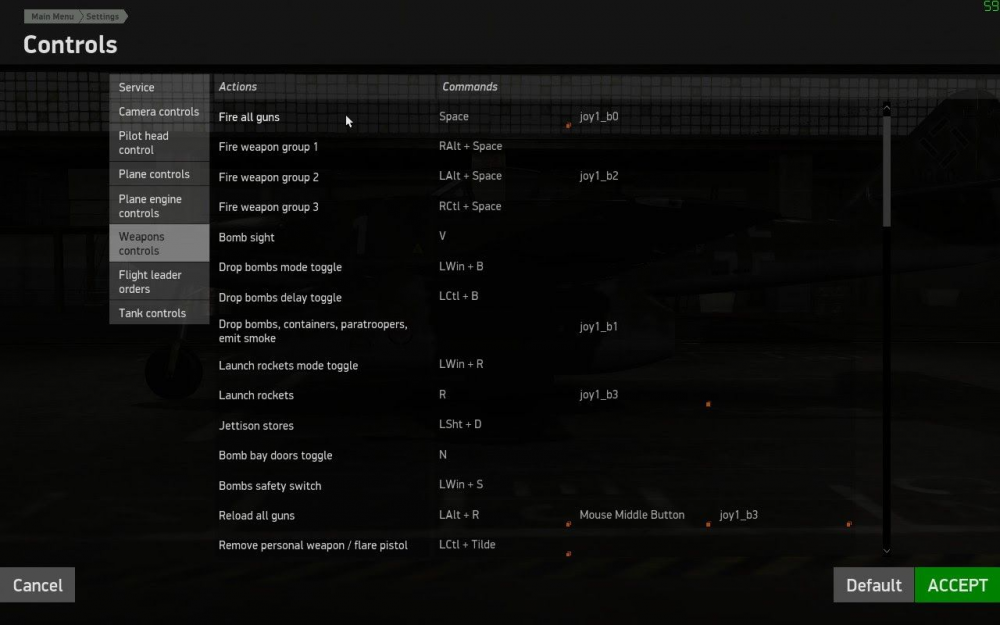
If you have a 2-stage trigger, set “Fire weapon group 1” to the first stage, and “Fire all guns*” to the second. If you just have a regular trigger, use “Fire all guns*” and bind “Fire weapon group 2” (your cannons) to a second button on your joystick.
Let’s move right down the line and bind everything you’ll need for the Weapons control section:
- ● Bomb sight (OK as keyboard bind “V”)
- ● Drop bombs mode toggle (OK as keyboard bind “Left Win+B”)
- ● Drop bombs, containers, paratroopers, emit smoke*
- ● Launch rockets*
- ● Bomb bay doors toggle (OK as keyboard bind “N”)
- ● Reload all guns (OK as default “middle mouse button”)
- ● Change firing position (OK as keyboard bind, used to switch between bomber crew)
- ● Turret: take/leave control (OK as keyboard bind “T”, used to unlock turret gun)
- ● Turret: nestle to the gunsight (OK as keyboard bind “Left Shift+T”, used to bring up iron sights)
Okay, that’s it for weapons. Let’s move on to the actual Plane controls. Here’s where it gets confusing for some people. IL-2 puts all
of the binds for buttons and axes for all of the planes together, so you’re going to see a lot of duplicate commands...like Rudder trim axis and Rudder trim switch left/Rudder trim switch right both have the same key binds. That’s fine. They both do the same
thing! It’s also worth noting that Axis and Allied aircraft obviously have unique systems that may do the same thing, so for example,
a Soviet plane might have Elevator trim, while a German one has an Adjustable stabilizer instead. Bind them both to the same key, because you’ll never be in a plane that has both!
Moving down the line, let’s bind up your flight controls. For any command that has a positive and a negative input (lever up/down, wheel left/right, valve open/closed), you’ll obviously have to input two key binds as part of a pair. Think of it like setting an axis, but with buttons.
- ● Plane control: pitch*
- ● Plane control: roll*
- ● Plane control: yaw*
- ● Rudder trim (If you know how to trim, bind all this shit. If not, don’t worry about it. I don’t trim for shit.)
- ● Elevator trim (Can share bind with Adjustable stabilizer)
- ● Aileron trim
- ● Adjustable stabilizer (Can share bind with Elevator trim)
- ● Flaps up*
- ● Flaps down*
- ● AirBrakes on/off (OK as keyboard bind, can share bind with Attack siren on/off for maximum drama!)
- ● Attack siren on/off (OK as keyboard bind, really only used for Stuka)
- ● Dive recovery system: on/off (OK as keyboard bind unless you dive bomb A LOT)
- ● Gear up/down*
- ● Tail wheel lock/unlock* (OK as keyboard bind, some planes have a manual lock, others rely on the position of the joystick)
- ● Wheel brakes* (Most planes will let you use this in combination with rudder input to use differential braking on the ground)
- ● Left wheel brakes (Bind if you have pedals/paddle switch you want to use)
- ● Right wheel brakes (Bind if you have pedals/paddle switch you want to use)
- ● Canopy open/close* (OK as keyboard bind)
- ● Navigation lights on/off* (Goons use nav lights as a warning beacon/call for help. Nice to have this bind handy!)
- ● Cockpit lights on/off
- ● Eject (OK as keyboard bind, you pussy)
Welcome to Engine controls! You have a few basic ways to murder your engine in IL-2, all of which involve either making it work too
hard or making it work too hot. Sometimes even too cold, if you’re creative. We’ll cover all of that in The Fundamentals of Flight, so
for now, we’ll just make sure all of your shit is hooked up.
If you have a ton of spare buttons, feel free to bind each separate control for your different oil/water radiators and inlet/outlet
cowls. If you don’t—and you want to use the default keyboard binds, that’s absolutely fine...but I highly recommend you also bind a separate set of keys to open/close EVERYTHING TEMPERATURE RELATED at once. That way, when you hop in a new plane, you
can press one of your two special MAX COOLING KEYS™ and know which systems your plane has. Or if you’re overheating and you
want to get frosty in a hurry, it only takes one press. Okay, buckle up, here we go!
- ● Engage engines start procedure / Stop engine* (OK as keyboard bind “E”)
- ● Engines throttle control*
- ● Engines mixture control*
- ● Engines superchargers mode switch*
- ● Engines turbosupercharger control (Bind if you love the P-47)
- ● Switch engines boost: on/off*
- ● Propeller RPM control* (Think of this as second in importance only to your throttle)
- ● Switch propellers pitch control manual/auto (This is handy to have in Axis planes, so you can baby a damaged engine)
- ● Propellers: high pitch (Same as Propeller RPM control +...bind it the same)
- ● Propellers: low pitch (Same as Propeller RPM control -...bind it the same)
- ● Oil radiators shutters control axis*
- ● He-111, Bf-110 oil radiators: open one step (Same as Oil radiators shutters control axis +...bind it the same)
- ● He-111, Bf-110 oil radiators: close one step (Same as Oil radiators shutters control axis -...bind it the same)
- ● Water radiators shutters control axis*
- ● Bf-109/110, Spitfire water radiator: open (Same as Water radiators shutters control axis +...bind it the same)
- ● Bf-109/110, Spitfire water radiator: close (Same as Water radiators shutters control axis -...bind it the same)
- ● Engines inlet cowl shutters control*
- ● Engines outlet cowl shutters control*
You did it! That was basically the hardest part of the game (except for starting the Me 262). Congratulations! Let’s just finish up the
binds with a few essential commands in the Service and Pilot head controls sections:
- ● Show/hide mission briefing* (Brings up your map in game)
- ● Show/hide entire HUD (Not essential, but nice to have if you want to hide chat, etc.)
- ● VR camera zoom* (Momentary zoom—ONLY for VR. There is no gradual zoom for VR)
- ● Pilot head: zoom in* (Gradual zoom—ONLY for 2D)
- ● Pilot head: zoom out* (Gradual zoom—ONLY for 2D)
Note: If you’d like to set curves or a deadzone for your joystick, you can do so by clicking on the grey arrow in the key bind field for
that axis assignment. Unless you have a stick extension or a special setup, default curves should be fine to get started.
Sample T.16000M FCS HOTAS Setup
Chapter 4: The Art and Science of Tweaking (Your Graphics)
Unfortunately, there’s no miracle formula to make you a spotting God, but we can make sure you haven’t fucked up your settings
too much. The big divide here is 2D vs VR, so we’ll go over settings for both.
The devs are constantly upgrading the game and adding new features, so “ideal” graphics settings are a moving target. If you’re the
type to min/max everything, head over to the IL-2 forums and see what people are doing. If you just want a solid base, you can start
here and adjust up as your hardware allows. Resolution, antialiasing, landscape filter, HDR, and sharpen will have the biggest
impact on how the game looks. Below is a fairly standard base setup for 2D that should provide good results.
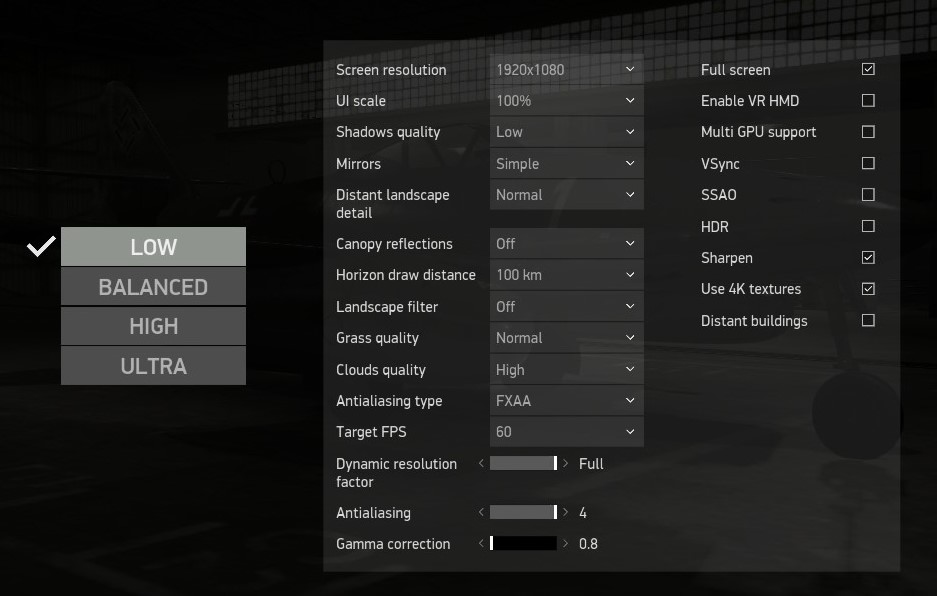
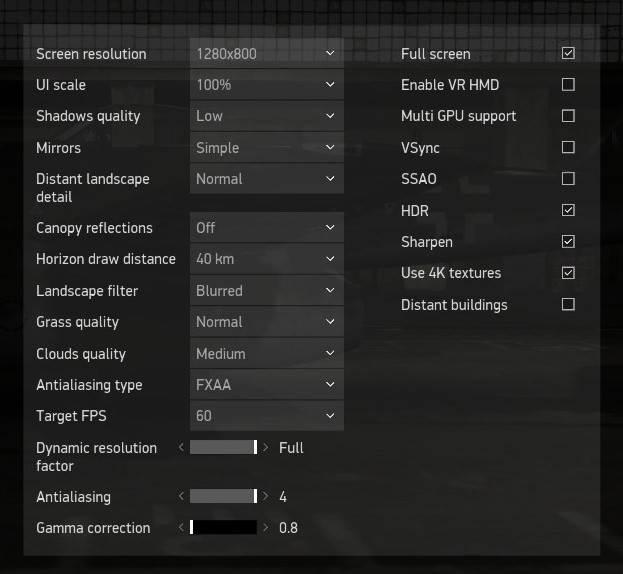
For VR players, it gets a bit more complicated. You can also adjust pixel density/supersampling to get the eye candy you’re happy
with. Personally, here are the settings I use in VR with an Oculus Rift, a GTX1070, and no supersampling in Steam:
Graphics Options Explained:
To keep the game fair, the devs made plane rendering completely separate from other objects/geography. No matter what
distances/values you select for the options below, it will not affect the distance at which planes are rendered for you. We can,
however, make it easier for you to spot those pixels.
- ● Shadows quality—Keep it on low or medium. You take a performance hit with no major benefit going higher.
- ● Mirrors—if you’re having issues, you can improve FPS significantly by keeping this on Simple of Off.
- ● Distant landscape detail—Exactly what it says. Normal is fine, there’s a performance hit for small returns above that.
- ● Horizon draw distance—NO IMPACT TO SPOTTING PLANES. This lets you see the geography from high alt.
- ● Landscape filter—I find spotting planes is easier with “blurred.” Turn this on if you have shimmering.
- ● Grass quality—You can set this to zero by editing your config file (see note below).
- ● Clouds quality—This is worth setting on High. You’ll be able to see enemies much easier.
- ● Antialiasing type—This is a new option in May of 2020. I’m sticking with 4x FXAA, but feel free to experiment.
- ● Target FPS—Only for 2D users. VR will lock the FPS automatically.
- ● Dynamic resolution factor—Will lower the quality if you’re having performance issues. Keep at Full, otherwise.
- ● Antialiasing—In VR, I use this instead of supersampling. I find it cuts down on “jaggies” and doesn’t blur fast-moving planes.
- ● Gamma correction—Lower values make it easier to spot distant planes in the sky as tiny pixels.
- ● Full screen—I keep this checked, even in VR. Some users have found it increases FPS significantly.
- ● Enable VR HMD—Fires up VR automatically.
- ● SSAO—This will add blur, making it harder to spot planes. Keep it off.
- ● HDR—I like having this on in VR, but most people keep it off, as it does have a performance impact. It adds contrast.
- ● Sharpen—Keep this on for spotting.
- ● Use 4K textures—Keep this on, even if you don’t have a 4K monitor. Apparently it helps with resource availability.
- ● Distant buildings—I leave this off because I’m hunting for planes, not fucking buildings.
For ADVANCED users (both 2D and VR), you can edit your startup config file (IL-2 Sturmovik Battle of Stalingrad\data\startup.cfg) to
set “bloom_enable = 0” and “grass distance = 0” if those types of things bother you in games.
Chapter 5: The Basics with Bonkers
Now that we’re done with the technical details, we’ll go over some of the more difficult topics in IL-2, all geared towards getting you
in the air and in the fight. If you’re new to flight sims, spend a little time here to shorten the learning curve and make your
multiplayer experience much more enjoyable. Being able to find enemies, hold your own in a fight, and rack up the kills isn’t hard, it
just takes a little bit of practice. There are five basic steps to becoming deadly:
- ) The Fundamentals of Flight—Startup, taxi, takeoff, and engine management fundamentals (fuck landing, you coward)
- ) Gunnery—Being able to land shots on target accurately and consistently
- ) Strategy and Tactics—Knowing when and how to enter and exit a fight, planning where to be on the battlefield, understanding your plane's strengths and weaknesses (and your opponents'), and being able to work with teammates to control the fight
- ) Situational Awareness—The ability to keep track of the fight around you as it's unfolding, knowing where the baddies are and where your friends are (both spotting planes and IDing them), and properly communicating that information to your teammates
- ) Dogfighting—How to get your plane in the right position for a kill, or out of the wrong position when the enemy finds you first
The Fundamentals of Flight
You have to start somewhere, and it’s usually the ground. Don’t worry, even Major Dick Bong had to visit the ground from time to
time. Probably to smoke weed. That dude was an animal. Anyway, let’s get you in a cockpit. I recommend starting out in the LaGG-3
or the Yak-1, as they’re both pretty easy to fly and will get you used to engine management without overwhelming your walnut-sized
brain. Begin with a quick mission against some trucks and trains, where you start from parked on the ground.
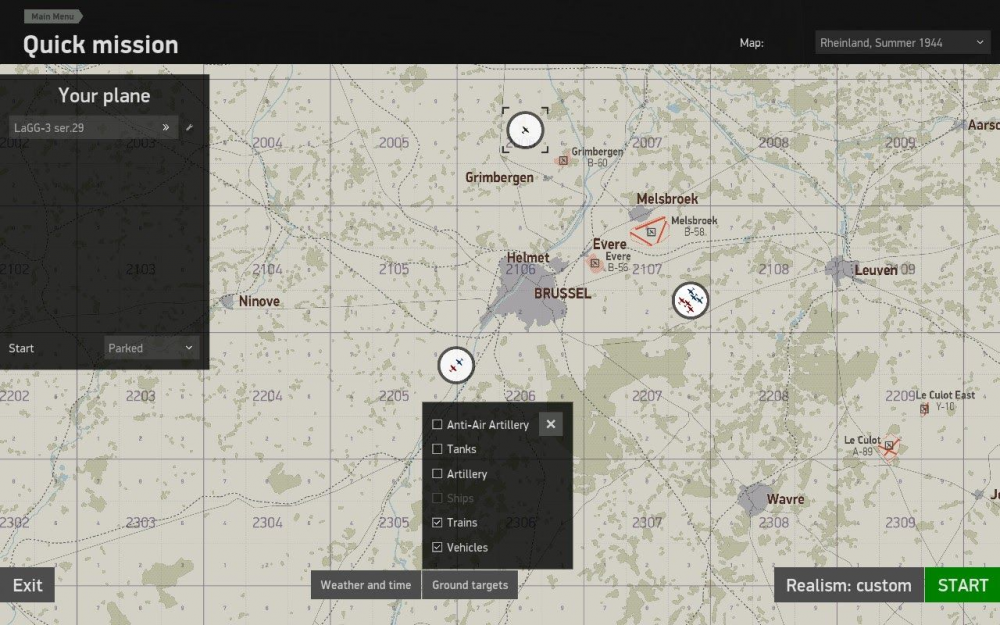
Let’s get your plane nice and customized. There are three tabs at the top of the menu on the right: Setup, Paint scheme, and Pilot stuff. Pilot stuff will let you add a photo of your sweetheart to the cockpit...or a very nice cheat sheet of engine specs:
https://forum.il2sturmovik.com/topic/55201-pilots-notes-for-cockpit-photos/
The Setup tab will let you set fuel levels and gun convergence (Bombers take about 40% fuel, most fighters take between 70 and
100%). Stick with about 300m for gun convergence now. You can adjust it later once you find your sweet spot to engage.
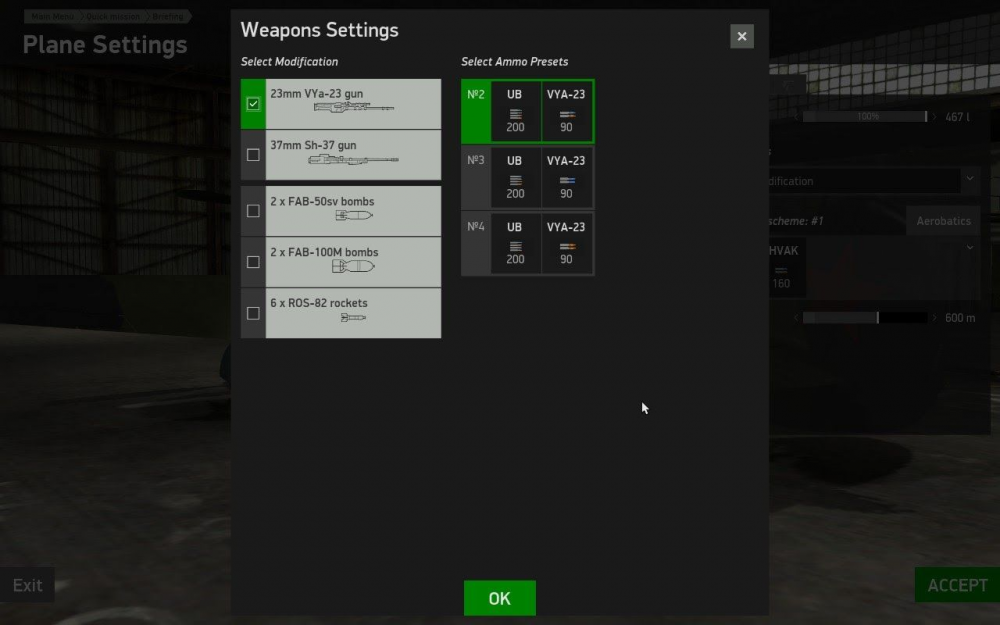
Click the “Modifications” drop down menu on the Setup tab. Select the 23mm cannon (it’s the bee’s knees). Ammo choices on the
right are orange for HE and blue for AP. HE will do a lot more damage to fuselage, while AP will murder pilots and engines. Take the
mixed ammo preset and hit OK. Then click “ACCEPT” in the bottom right and hop into your plane.
Taxi and Takeoff
As you enter the cockpit and move your throttle around, you’ll see some icons on the right side of your screen showing input
position. These are called “technotips” and they’ll help you not break the shit out of your plane.
![]()
All right, let’s fire this bitch up!
- ● Crack your throttle about 15%.
- ● Open your mixture to 100%.
- ● Open up all of your radiators. You bound these, remember? The LaGG-3 has oil rads and water rads.
- ● Press “E” to Engage engines start procedure. You’ll begin to see a lot of technotips as the plane starts up.
Once the engine sputters to life, you’re ready to taxi. I use the term “taxi” very loosely. Everywhere’s a runway during a World War.
Note: In some planes, you’ll have to unlock the tailwheel to taxi easily (Don’t worry, not needed in the LaGG-3). If you’re in a new
plane, press your Tail wheel lock/unlock bind (Bf 109) or move the joystick forward and back (Fw 190) to see if your plane has a tail
wheel lock. If it does, make sure you use very small throttle inputs while maneuvering or keep your Engine propeller RPM at 50%.
You can ride the wheel brakes and use rudder or use left or right wheel brakes if you need to. Once you’ve aligned for take off, make sure you roll a few feet straight, then lock your tail wheel with the bind, or by holding the stick back towards you.
- ● Close your canopy and set your flaps to 20%, if you like. I’m not your boss.
Okay, let’s begin our takeoff roll. Increase your Engine propeller RPM to 100% and throttle up to 100% slowly.
When you apply power, Soviet planes pull to the right, and German planes pull to the left. Compensate with a little bit of opposite
rudder. If you’re having trouble keeping it straight, lower the RPM down to about 60% and make a longer takeoff roll as you ease the
RPM and throttle up. Once you’re in the air, raise your gear and flaps. You did it! Now let’s focus on not breaking that engine.
Engine Management
Engine management is fairly straightforward, but there are a few different types of planes in IL-2, and they have different
automatic/manual operation, as well as cooling systems and superchargers, boost modes, turbosuperchargers, etc.
Here’s a quick overview of inline/radial engines, German/Soviet engine management, and different cooling systems.
Inline engines (Bf 109, LaGG, Yak, etc.) will generally have both water/coolant and oil radiators, each with a set of shutter controls.
Oil radiators are typically small and don’t create much drag, so you can run them at 100%. Water radiators are big, so you only want to open them as much as you need to.
Radial engines (La-5, La-5FN, i-16, Fw 190, P-47) are big ol’ fatties and rely on massive amounts of airflow to stay cool. They also
have oil radiators as well. The inlet and outlet cowl shutters determine how much air goes in and comes out of the engine area,
respectively. Inlet cowls are small and don’t make much drag, so keep them at 100%. Outlet cowls are enormous and will kill your speed. Only open them as much as you need to. An important note here is that radial engines need air to stay cool, so you need
speed to move more of that air quickly...but the harder you work the engine, the hotter it gets. Quite the paradox. So stay fast, watch
your speed in a climb, and keep your outlet cowls under 15% whenever you can.
Watch the technotips for warnings about overheating, and keep an eye on your temperature gauges as well. In radials, your cylinder
head temperature is the best indicator of engine health—try to keep it under 215°C. As a general rule in most planes, keep your
water temps under 110°C and your oil under 85°C in the 109s, whereas the Soviet planes can stand a little bit hotter oil up to 110°C.
These are just ballparks, so check that Specification tab on the map screen to see what the real numbers are for your plane. Don’t
come after me because “Bonkers promised I’d be fine at 110°C.” You oil-covered little bitch.
Of course, if you’re a nerd and like technical details, you can read more about operating limits and specifications for all of the
planes here: https://forum.il2sturmovik.com/topic/25993-aircraft-flight-and-technical-specifications-and-operational-details/
You can add many of these engine specs to your plane cockpit with the previously mentioned Pilot Notes mod:
https://forum.il2sturmovik.com/topic/55201-pilots-notes-for-cockpit-photos/
Next up, let’s talk about some of the differences between Axis and Allied aircraft, specifically German vs. Soviet. This is important,
because you should probably pick one side (and one plane) and fly it for a while so you can get comfortable.
German planes are generally very automated. They have automatic pitch control. You move the throttle up, the plane does the math
for propeller pitch settings and how hard the engine should work. Most German planes also automatically control the radiators for
you. Nice! There are a few exceptions (The 190 uses a radial engine and some of them have manual outlet cowl flaps. German
bombers are very manual). All you have to do is NOT run the throttle too high for too long. Using those technotips we talked about
earlier, you’ll see a few different settings, each with a different time limit:
![]()
![]()
![]()
If you open Show/hide mission briefing (default keybind is “O” for Oscar), you’ll see a Specifications tab at the top right of the page.
On this page, you’ll find customized information for whatever plane you’re flying, and it’ll tell you how long you can operate in Climb
mode, Take-off mode, Boost mode, etc. You generally get 30 minutes of climb or combat power and 5 minutes of boost. Take off
mode should not be used for longer than it takes to get your wheels off the ground. These time limits reset after you ease up on the engine and cruise in continuous for a while.
Note: on planes without automation/constant speed propellers, you have to set the pitch/RPM manually. This means you have to
mix and match the throttle and RPM to get a comfortable load on your engine as you want to speed up or slow down. Try to stay in
“continuous mode” for cruising and “combat or climb mode” when you need to scoot. Check the Specifications tab for different
manifold pressure/throttle and RPM/pitch settings. Below, you can see the effect raising the RPM and throttle have on the engine:


Soviet planes were designed by bureaus who didn’t trust illiterate farmhands as pilots, so a lot of the engines were limited from the
factory. You can run many of them at 100% throttle and 100% RPM all day long, comrade!
Superchargers are a special type of engine function that crams more air into the engine so you can be more efficient at higher
altitudes. On some planes, you can manually switch these on. Again, the Specifications tab will tell you when, but it’s generally in
between 2500 and 3500m for most Soviet planes (Go-go German automation!). Boost is a second type of engine function that lets
you pour that go juice into the engine when you wanna go FAST. Treat boost as you would max throttle/RPM and make sure you
stay under the time limit.
Last up in the ever-riveting saga of engine management is mixture! That’s right, it’s time to bring air and fuel together to make that
beautiful speed... and hopefully not a lot of smoke because the Germans can see that shit from miles away.
Basically, you start out on the ground at 100% mixture. The higher you go, the leaner you want that mixture. But how do you know
what the right setting is? Sure, you can watch the gauges and try to find that sweet spot, but that’s some egghead shit. I have a
better way. Hang outside the cockpit a bit so you can see the flames coming out of the engine exhaust, and lean out the mixture until the flames start to turn from yellow/orange to pale blue. If poking the old peepers outside your cockpit isn’t an option, you can
also look behind you and lean out the mixture just until your smokey black trail disappears. Be sure to do this with your wingman
as you climb away from your airfield, so nobody spots you on your way to the objective.
Technically, you can run at 100% mixture all day (just like you can run with your radiator/cowl shutters 100% open all the time),
you’ll just be smokey as hell, down on power, and very fuel inefficient. If you wanna roll coal, go for it...but if you’re flying next to me,
I will use you as bait.
Note: the leaner your mix, the hotter your engine runs. If you’re running a lean mix, keep an eye on your cylinder temps.
I hear you. This mixture deal sucks dong. Good news! Some of the planes have an “auto mixture” setting, where you select a
specific, magical percentage and the plane will automatically adjust mixture for you—all the way from the ground to the service
ceiling. Those planes and values are as follows:
- ● P-40 (33% mixture = auto lean, 66% = auto rich)
- ● MiG-3 (50% mixture = full auto)
- ● i-16 (100% mixture = full auto)
- ● IL-2 (50% mixture = full auto)
- ● Spitfire (100% mixture = auto rich, 0% = auto lean)
- ● La-5 (100% mixture = full auto)
Gunnery
Putting rounds on target is the single most important ability for any fighter pilot. I don’t care if you bounce like a mofo on landing or
can’t tell East from West, if you can put holes in an (enemy) airplane when it’s in front of yours, you are golden.
There are plenty of great video tutorials on different gun sights, how to estimate target range, etc. Requiem put a lot of time and
effort into his series. It’s worth a watch: https://www.youtube.com/playlist?list=PLnyigzFtHeNpq6ozRQaIfU_fgOs9mBKH4
That being said, there’s no substitute for simply hopping in a plane and practicing. Don’t get caught up in all the math. In a fight, you
don’t have time to count mil dots or check wing sizes. Let your lizard brain take over. Humans are exceptionally good at throwing
rocks at birds, hurling 20mm rounds at Peshkas, or doing whatever God really intended us to use that amazing hand/eye/brain
coordination for.
Start up a quick mission with your favorite plane, turn on unlimited ammunition, and practice strafing trucks. Once you’re able to
consistently destroy a line of trucks with individual bursts of the gun, move on to aerial targets. Select another quick mission
against Ju 52s or Pe-2s, but go into their plane setting options and remove their ammo so they can’t shoot back. Once you’re able
to land shots consistently, repeat the mission against unarmed 109 F-2s or P-40s.
Here are a few helpful tips to get you started:
Resist the temptation to shoot while zoomed in. Zoom in before your attack run to see what you need to, but release the zoom
before you fire. If you don’t zoom out, you will target fixate, lose track of your plane’s real position, and end up in the ground or in the
back of your target.
Change your gun convergence based on the type of guns/plane you’re using. Are you flying an American plane armed with a
million .50 cal guns in the wings? Use a lower convergence that’s true to your actual engagement range. You want concentrated
firepower at the exact range you like to shoot targets (200m, 300m). When all of your bullets hit together, they’ll tear the target
apart, instead of riddling it with little holes. For nose-mounted guns, this doesn’t matter as much, because there’s no horizontal
point of convergence to worry about. In this case, I like a higher convergence (400m, 600m), because it’s easier to deflection shoot
when the rounds leave your plane angled up, into your turn with the guy you’re fighting.
It’s incredibly easy to miss a shot from directly behind an enemy plane. After all, you’re aiming at a tiny circle. This can be
frustrating, especially when you’ve snuck onto their six, got all lined up, and then WIFF...you send a stream of bullets over their
canopy or above and below their wings, blowing the engagement. Planes are at their smallest when you’re directly behind them. So
don’t attack from their tail. Instead, dive underneath them and make your attack run from their low six or offset by a few degrees. In
the image on the left, I’m sneaking up on a 109 and almost ready to bounce him. I’ll continue this shallow dive and just before I’m
underneath him, I’ll make a sharp climb and try to put my shots in the center of his plane from below. It’s a lot easier to hit the target
when you have fuselage and wings filling your gunsight. In the image on the right, I’ve made the target bigger by offsetting to the
left by a few degrees. This lets me put shots on the side of his plane, instead of aiming for a tiny circle from the back.
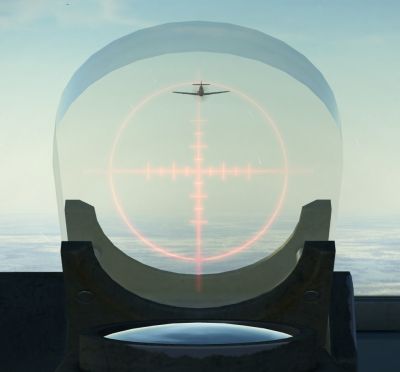
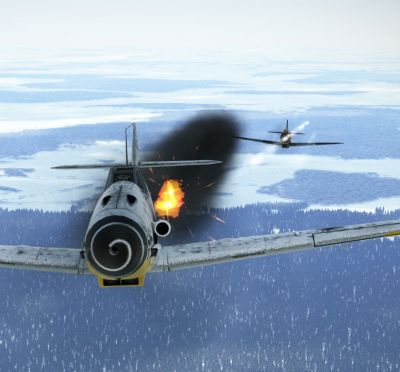
Once you’ve progressed from “I can’t hit this plane” to “I can hit this plane, but it’s taking me forever to kill it” it’s time to start getting
serious about aim. Anyone can land hits, but excellent pilots kill quickly. The longer you’re attacking, the more likely you are to get
shot down by one of your target’s friends. Kill quickly and get gone. Different planes have different weaknesses, and you’ll find it’s
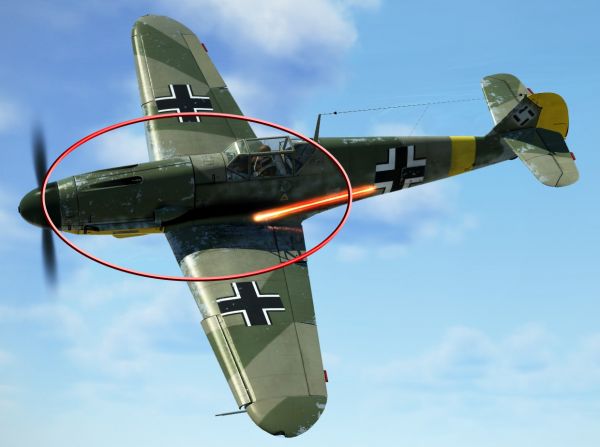
much easier to shoot a specific component/structure/pilot than it is to fill the plane with lead. In general, there are a few spots you
should be trying to land your shots, and on fighters, they all fall in the same area. Putting rounds into the cockpit, wing roots, and engine (in that order) will get you quick kills. Oval of death pictured below, complete with incoming round to wing root:
As you fly more planes, you’ll learn their Achilles’ heel. Flimsy tails and delicate cooling systems in the 109 will let you know how to
bring one down. Flying the invincible Pe-2 but dying to pilot snipe will show you even the mighty have weaknesses.
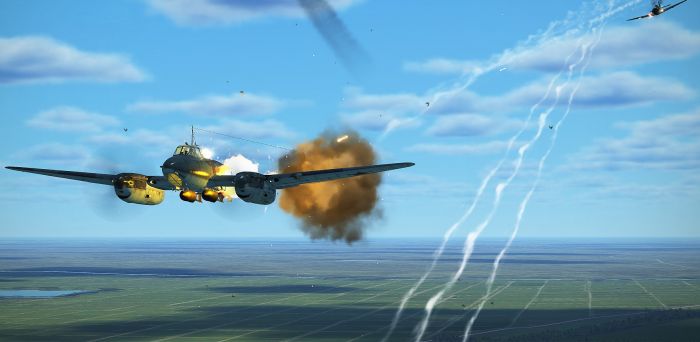
Speaking of bombers, here are some pointers to keep you alive while you try to land shots. Do not attack anything with a gunner from behind. Make slashing attacks on bombers. Pull up alongside them on whichever side is opposite your dominant eye (Look
through the gunsight with your right eye? Pull up on their left). Stay about 1000m offset and 1000m above them, just outside their
gunner’s range. If the waist gunner starts shooting at you, that’s fine. You can waste his ammo and jink up and down to easily avoid
his fire. Once you’re just ahead of his plane, it’s time to make your slash. Begin your dive, but don’t aim for his plane. Aim for a spot
about 500m in front of his plane. Line the horizontal bar of your gunsight up with his flight path. If you time it right, you’ll intercept
him and the crease where his wing joins his cockpit will fill your windshield to one side of your gunsight. With your gunsight just
ahead of his nose, give him a burst and continue a smooth dive underneath him (if he’s at treetop level, pull up and pass over him
instead). Once you’re past him, don’t make any sudden turns. Maintain your energy and make a shallow climb on the other side,
check your six for gunner fire, and reset to the mirror position from your first attack. Set up for another slashing attack from this
side. Repeat until you snipe his pilot, get a wing off, or make both engines smokey.
Strategy and Tactics
Up until now, you’ve been on your own. From here on out, you’ll have some help from other goons, who will let you know where to go
on the map, how to get there, and what to look for along the way. Much of this will depend on what you’re flying and who you’re
flying against. We’ll talk more about the play style differences between Axis and Allied planes in the Dogfighting section, so for now
let’s focus on some general rules for getting into a fight and working with teammates.
When you’re new to the game, it can be a bit daunting to head out to the frontline. It seems like someone always finds you but you
can never find anyone. A big part of getting comfortable comes from knowing how to use your plane and how the enemy uses
theirs. After a few hours, you’ll know where to put your plane on the map, how to find the enemy, and when to engage.
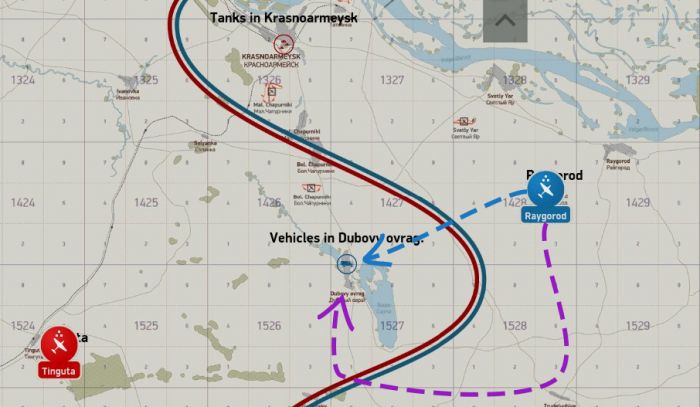
Most multiplayer maps will have a defined frontline and marked objectives for you to attack and defend. Let’s say we’re flying out of
Raygorod and attacking the Vehicles in Dubovy. If we take the blue path, we’ll probably get jumped by enemy fighters out of Tinguta,
who are most likely running a screen in between our airfield and the vehicles objective, waiting for us. Instead, if we fly the purple
path, we’ll come from a different direction and we will already have started our attack run by the time they spot us. If we’re lucky,
we’ll drop our bombs in one pass and we’ll be lined up nicely for a return run to base.
From the defender’s perspective, here’s what we should do in the same situation, using ambush fighting techniques. We’ll run a
screen using the orange flight path, making sure to stay outside the 10km radius of their airfield (in green). This isn’t absolutely
crucial, but on most servers, if you approach within 10km (one map grid), the airfield defenses will shoot up a flare and notify
players that an enemy has been spotted.
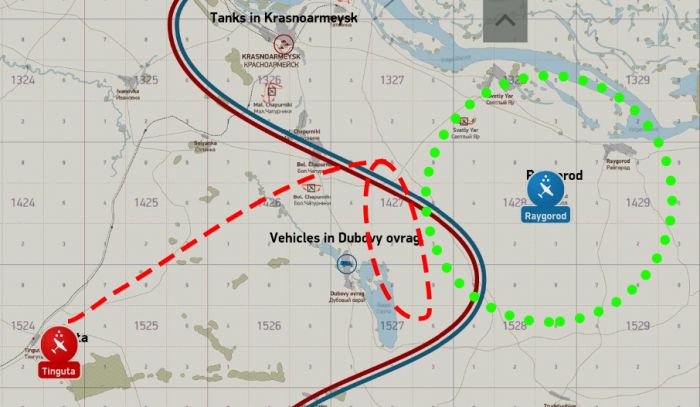
Let’s be sneaky and stay hidden for now. Ok, back to the planning. We’re going to orbit at about 3000m to 4000m. What we’re
looking for is attackers on their way to the target, not ones already attacking it. We want to jump them before they (or their escorts)
are ready for us. So if we’re flying north on our circle pattern, we’ll look out the right window into grid 1428. Look on the deck and
watch for planes over light-colored fields or crossing roads. That’s when they’re easiest to spot. Avoid spotting over forests, as you
will often lose the target in shadows when you dive on them. Every once in a while, look up and check your surroundings. Make sure
no one is trying to bounce you. If you’re flying with a team, the lead will spot targets and call them out. Your job is to keep your eye
on the leader and to check above and behind your flight. Don’t fly in formation, but stay close enough that you won’t lose him.
Your flight lead will get everyone to the same area and altitude so you can coordinate. If you have a big flight, work in pairs to cover
more ground and watch each other’s backs. In the example above, this would mean a wingman pair heading north and a wingman
pair heading south in the same orbit. You’re all in the same area, clearing each other’s sixes and looking for anyone that shouldn’t
be there. When you find a target to bounce, one wingman stays high to cover, while one goes down to intercept. Don’t all go down at once! It’s easy to get greedy for kills, but having four friendlies on one enemy only gets you one kill, while putting everyone at risk.
With a wingman pair staying high, you can get even more kills when enemies come in to bounce the bouncers.
This is an excellent opportunity to discuss one of the most successful strategies: the drag-and-bag. A cohesive wingman pair can
turn a bad situation into a great one. When someone’s picked up a tail, they’ll call it in over the radio. “I got a six, need help. 1427 keypad 4, heading West on the deck.” If they’re heading away from you, let them know and ask if they have enough separation to
change course. (Note: if you have a big flight operating in a heavy fighting area, have a rendezvous spot picked out ahead of time
and plan to drag enemies back there. It’ll save a lot of time and frustration.) Depending on the speeds involved, the friendly being
chased will hopefully be able to bring his follower underneath your flightpath. If you’re having trouble spotting the fight, ask the
friendly to turn on his nav lights (this is also a great way to make an attacker check his own six, even if you don’t have backup
coming). If everything goes according to plan, you’ll swoop in and get on the six of the attacker before he closes the gap on your
teammate. Give the person being chased a heads up and an ETA. e.g. “I see you. Stay on current course/come left 60 degrees, I’ll
be there in 30 seconds.” If you coordinate properly, you can even have the lead plane put the enemy into a shallow bank just before
you’re ready to shoot, exposing his cockpit and wing roots for a nice, clean kill.
It can be a bit confusing on comms if you have more than 3 or 4 people in a flight, so keep your transmissions brief and listen out
for location calls. Nobody likes having to repeat themselves—especially when they’re in danger—so always pay attention when you
hear a grid reference (each grid is divided into nine “keypads” so a call would be “1129 keypad 5” and then a direction and a rough altitude) and keep track of them as you go. We’ll talk more about that in the next section on Situational Awareness, which ties in
very closely with some of the topics we’ve mentioned here.
No discussion of game strategy would be complete without a brief word on a topic very near and dear to my heart: vulching. This
gentlemanly art is when you wait just outside the alert radius of an enemy airfield and ambush planes either on the ground or just
taking off. It’s the ultimate use of “energy” over an opponent. 😏 Watch out for AAA, and never fly directly at an
emplacement...change your course every few seconds as you make your attack run and stay low on your way out. Vulching can be
combined with the drag-and-bag to lure defenders to a teammate waiting at altitude a grid away from their airfield.
Patrolling the backfield is another great way to amass kills. By crossing the frontline and working in the enemy’s backyard, it’s a lot
easier to find people to fight (and IDing is easier because friendlies don’t usually take off from enemy airfields). Most importantly,
this lets you jump targets that aren’t even looking for you, which is how you should get most of your kills.
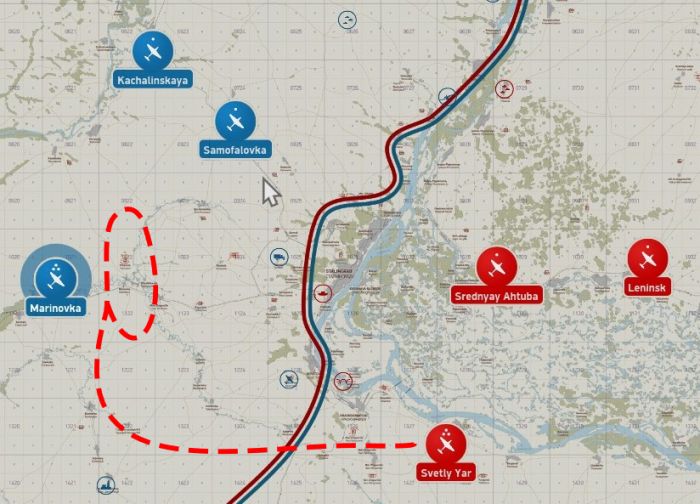
By starting our search close to their airfield, we’ll pick up all of their flights, no matter which objectives they’re going to. Tail them at
altitude until they’re one or two grids away from their base, then attack. If there’s only one objective near that airfield, fly your screen
back and forth between the airfield and objective. Even if you’re spotted, they’ll probably think you’re a friendly RTB or on your way
out to attack.
Situational Awareness
Keeping track of what’s going on around you is a skill that really only comes with time. The more hours you spend in the air with a
wingman or two, the easier you’ll find it to keep tabs on friendlies or spot enemies. When you’re out on patrol, you’ll start to
recognize the way your wingman flies, and it’ll be a lot easier to spot them in a fight because you can anticipate where they’ll be. It
makes it a lot easier to do things like clear someone’s tail when you know where to look and what to look for.
At first, you’ll have to constantly check the map, remember grid references, and keep track of where your lead or wingman is. After a
while, it gets a lot easier, so don’t worry if you can’t find anyone or keep losing targets.
Spotting is a huge part of the game. Yes, graphics/2D/VR have an impact, but not as big of an impact as you might think. It’s more
about knowing where to look and what to look for. If you’re at altitude and looking for contacts at your level, do a quick 360° to see
if anything jumps out at you. If you don’t spot anything close, it’s time to focus on the highest probability sector (a 45° cone you
expect to see enemies come from). Always set up your patrols so that the potentially target-rich area is on ONE SIDE of your plane. Never fly through the middle of the zone. You’ll be much safer and you’ll have half the area to scan. Zoom in and relax your
eyes a bit. Don’t look for planes, look for changes in pixels. They’ll jump out at you after a while. Pretend like you know a plane is
there and that you just have to find it.
For spotting targets below you, terrain and sunlight/shadow play a much bigger factor. Try to have the sun on the opposite side of
your cockpit from the target area (not only because Hun in the Sun, but also because it makes it easier to see reflections). Focus
your spotting efforts over clear fields, rivers, or road gaps in the forest. Once you find a target, call it out to your wingman and begin
your dive when he’s either found the same target or he can see you diving. This will help if you lose the target in your dive. As you’re
changing altitude, the sunlight will change, and you can lose the target. Don’t worry, just keep note of where he should be. Dive
down behind his flight path and try to silhouette his plane against the sky. If you’re still having trouble, have your wingman vector
you in.
Identifying your target is the next challenge. This is another skill that becomes easier with time, as you start to recognize wing
shapes, fuselage lines, and even paint schemes. I’ll provide some ID charts on the next pages, but here are some good pointers to
remember. Axis shoot whitish/yellow tracers. Allies shoot reddish/orange tracers. You’ll see the difference very clearly. This can
help you tell who the bad guy is and who needs help when you’re approaching a furball. Soviet planes tend to be a lot smokier, with
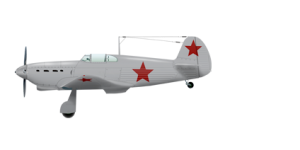
their manual mixture settings, so it’s easy to spot them. If you see diamond-shaped wings or elliptical wings, it’s a clear sign of a
Yak or Spitfire. Soviet planes also tend to have radiator vents in the middle of their fuselage, while 109s have symmetrical radiator
vents on both wings, so if you’re tailing someone and you see a big vent underneath their plane, they’re probably Soviet (or flying an
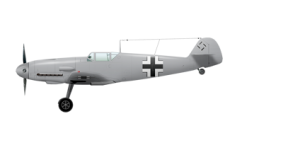
MC.202, but shoot them anyway for flying that ridiculous plane). Bf 109s will have very skinny wings, positioned close to the nose of
the aircraft, and very thin tail sections.
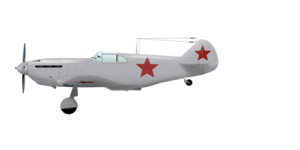
La-5s and Fw 190s can be tough to tell apart from behind, as they both have similar profiles with that big fat radial engine. You’ll see
a radiator on the La-5’s belly, which isn’t there on the 190. The 190 will also look like the weight of the fuselage is “bending” its
wings, as the wings point up, away from the cockpit, while the La-5 has wings that are almost as flat as the horizon.
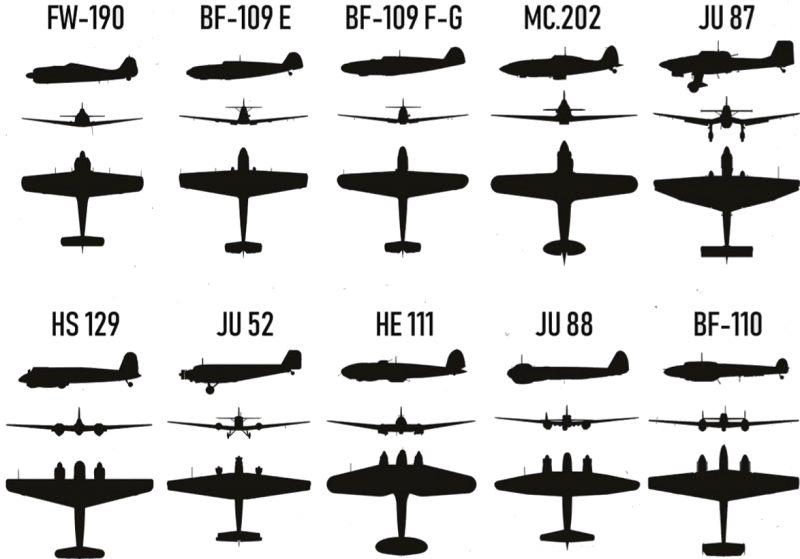
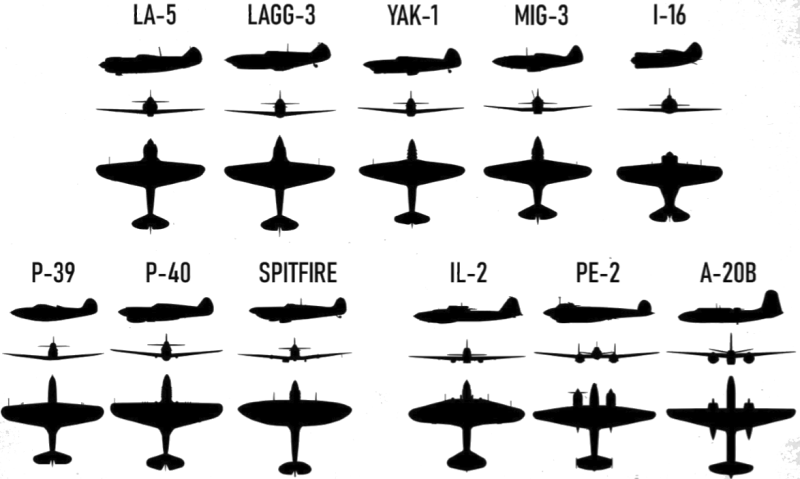
It’s common for new pilots to mistake the P-39 or P-40 as 109s, since they have skinny, flat-faced wings. The P-40 has a monster
engine cowling, triangular back wing face, and a very long nose. The wings are also set much further back than a 109. The P-39 has
a similar wing shape as the 109, but a weird banana-shaped fuselage and, again, a much longer nose.
Pe-2s and Bf 110s can also be tough to tell apart, as they both have twin-engine, twin tail designs. The 110 is much boxier, with
straight wings and angular canopy, whereas the Pe-2 looks much softer and rounder.
Another essential part of situational awareness is maintaining composure in the fight. Let’s talk about that in the next section.
Dogfighting
“Bonkers, why did you put the dogfighting section last in the series of basics? Shouldn’t it be number one?” you say, with palpable
disdain. Well, my smooth-brained friend, you don’t actually have to be good at dogfighting to do well in IL-2. In fact, if you do the
other 4 steps properly, you won’t even have to dogfight. That’s the benefit of using ambush fighting techniques we talked about in
Strategy and Tactics.
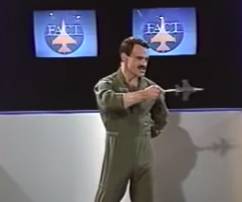
“But real pilots study dogfighting maneuvers religiously! I saw a video where a mustachioed man with a moose knuckle and toy plane on a stick went over ‘smash’ and ‘corner speed’ with great aplomb.”
Real pilots don’t get infinite lives to learn from their mistakes. After a few hours in game, you’ll
find you’re naturally doing a lot of the maneuvers a WW2 pilot would do. Split-S? Chandelle?
That’s what those are called? You do those already!
Drinking from the firehose won’t help new players. Yes, learning about the OODA loop, the
tactical egg, and ideal corner speeds will give you an edge in combat, but all of those things
should come after you’ve had a chance to learn how to fly your plane and engage the enemy. It’ll help you break through a skill
plateau...but it’s too much at the beginning. Let’s start with the basics and you can build from there with some really helpful video
tutorials I’ll include in the resources section.
It’s often said that Germans are energy fighters/boom and zoomers who stay at high altitude, while Soviets are turn fighters who
stay on the deck. That’s not always the case, but it’s fairly accurate for many of the planes and players you’ll come across. If a
properly positioned 109 or 190 doesn’t want to fight you, he won’t. In those planes, you really can engage on your own terms. A 109
can outpace you in a gentle climb while a 190 can dive away and hold speed better than you can. Similarly, an La-5 or La-5FN can
chase down pretty much anything on the deck, and Yak-1s and Spitfires will cut very graceful lines through the sky to turn inside of
you or dodge attacks. Bodenplatte adds a new dimension to this dynamic, but the overall principles stay the same.
Knowing when to engage—and when to disengage—are the most important parts of dogfighting. Discipline is essential, especially if
your plane relies on energy (speed/altitude) for its advantage, instead of something that can get you out of harm’s way, like
stunning acceleration or great sustained turn performance. This means you need to give your plane enough stored/potential energy
to do its job. Using the 109 as an example, we should try to begin our fight from a higher altitude than our enemy. If the enemy is
higher than us, then we leave, climb, and come back higher than he is. Fights often evolve like this, with enemy fighters “pushing”
friendly fighter cover down until there’s one massive furball on the deck. We, of course, want to be the ones doing the pushing.
Continuing the example with our Bf 109, we want to dive on the enemy and maintain our energy advantage so he can’t get shots on
us if we miss the bounce. We dive down, attack, extend, and return to our perch in a shallow climb, rinse and repeat. This means
nice, smooth joystick inputs. The 109 can climb, but if you go straight vertical after your bounce, your target can prop hang
underneath you and take potshots. Keep your speed up and zoom away before returning high. If you have a wingman, take turns
bouncing the target. Communicate and let your teammates know when you’re “in” and “out” of an attack run.
On the other side of that situation, what do you do if you’re getting bounced from above? First, you have to see the attack coming.
That’s why situational awareness is so important. When we see the attacker coming, we can use his energy against him. How?
Counterintuitively, we get underneath him. The game is punishing to players who don’t pay attention to dive speed. If you dive at too
steep of an angle, your controls will lock up (especially in the 109), your ailerons will depart your plane violently (especially in Soviet
planes), and your pilot will pass the fuck out when you try to pull up. By turning into a high attacker or “breaking” at the moment just
before he reaches his engagement distance and opens fire, we can mess up his bounce. He’ll be going so fast that he can’t easily
reposition for a shot...his controls won’t allow it. If he extends and repositions for another bounce, we move underneath him again.
If he gets greedy and doesn’t extend properly, as we discussed above, or if he abandons his energy advantage and turns to fight us
because he’s tired of our shenanigans, we can fight on more equal terms. It’s important to note that unless he fucks up, you’re on
borrowed time. You can spoil a few of his attacks while waiting for a friendly to come help you, but if the attacker has a high energy
state and lots of discipline, you’re probably boned.
Let’s say we’ve got relatively equal energy states. Maybe the attacker has a little more energy and a better position behind us. What
can you do to buy some time or (hopefully) flip the situation to your advantage? A good option is something called scissors. Rolling
scissors are especially useful if your plane isn’t great at turning, but has a nice roll rate. Done well, you can very quickly turn the
table on an attacker. We’ll go over this maneuver so you have at least one move in your bag of tricks.
It’s probably easiest to think of any of the scissor maneuvers as simply a way of transforming your movement across one
dimension (in this case, the horizontal) into another. We want to take our flight path and scrunch it up into a smaller horizontal
space, so that our attacker overshoots. Think of it as hitting the brakes, but we get to keep most of our speed.

In rolling scissors, we’re using your plane’s energy to take up more vertical space, hopefully putting us behind your attacker. You
can do flat scissors or vertical rolling scissors, but the principle is the same: transferring movement from one dimension into
another. This is what rolling scissors looks like with an attacker:
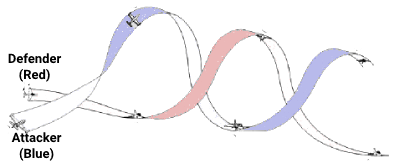
By making nice, smooth inputs on the joystick, we can conserve our energy and let gravity help us out on the dive portions—and by making sharp rolls at the top and bottom, we can change direction quickly. Try to keep your eyes on the attacker throughout the maneuver. It’ll let you know when you can stretch the vertical and when you need to roll and change direction. As you approach the top of your scissors and you’re almost at your slowest, pay special attention to the attacker. If he’s super close, he will nose up higher for a deflection shot and he might have to put your plane under his nose to do it, meaning he won’t have eyes on you. Roll over quickly and change direction when you see him pull hard for a lead shot. This will buy you an extra second or two to burn more horizontal space with scissoring and get an advantage.
There are plenty of resources if you want to learn about energy management and Basic Fighter Maneuvers (BFM) or Air Combat
Maneuvering (ACM), so I won’t reinvent the wheel here, but this should be enough to get you started. Good luck and have fun!
Additional Resources
Requiem’s Air Combat Tutorial Library
https://www.youtube.com/user/RequiemBoS/playlists
Sheriff’s Sim Shack
https://www.youtube.com/channel/UCEOoU9PxkXEmsFdzrbvx37A/playlists
Chuck’s Guides
https://www.mudspike.com/chucks-guides-il2-battle-of-stalingrad/
Col Ninny
https://www.youtube.com/channel/UCrawg1oXJ5xs0mQCsEeXkAA/playlists
Jason Williams (IL-2 Producer) Graphics Guide
https://forum.il2sturmovik.com/topic/34764-jasons-quick-guide-to-3001-graphics-smoothness/
Geronimo’s Graphics Guide
https://forum.il2sturmovik.com/topic/49629-3000-steps-condensed-into-one-simple-performance-guide-plus-spotting/
Comprehensive List of IL-2 and Flight Sim Resources
https://forum.il2sturmovik.com/topic/47213-il-2-sturmovik-resources/


